Tools, tips and techniques for making splendid Arma 3 screenshots
To support the lensmen among us, our very own Senior Designer @KarelMoricky wrote a handy guide about the new tools for screenshot-taking in Arma 3. Introducing the Splendid Cam, alongside some of the other Debug Console features he implemented, Karel walks us by a few of the basic settings and shares a couple of tips on how to make the ultimate screenshot.
Introduction
Arma 3 can be quite a photogenic game. When you look at its screenshots, they often look more like the photos you'd take on your summer vacation rather than gritty frontline shots. As with real-life photography, capturing the perfect moment takes knowledge, preparation and, unsurprisingly, luck. The fact that you own a camera doesn't automatically make you a Pulitzer-winning photographer, the ability to rapidly press F12 in game won't turn you into skilled screenshot maker. However, Arma 3 ships with many powerful new tools which allow you to arrange and capture a scene in a way that real photographers can only dream of.
Craig Pearson from PC Gamer already wrote a guide providing some basic tips in his Postcards from Stratis: how to take fancy screenshots in Arma 3 article. Here you’ll find some well-known Arma 2 methods, sufficient enough for producing some pretty decent screenshots. However, you don't want to fight your last war, and thanks to the many new tools shipped with Arma 3, you won't need to. Let's take a look at them.
 This is the latest version of my Arma 2 console, previously available only in addon variant. No installation is required this time, the console is now immediately accessible from the pause menu when previewing a mission from the editor.
The Expression and Watch fields helps you to execute and check game states and variables. If you know any scripting, the console will become a powerful tool in your hands, letting you adjust any scene on the fly. For those unfamiliar with SQF syntax, I'll provide some code examples later in the article.
For now let's focus on the set of buttons on the bottom. You may ignore Functions, Config and GUI Editor, as you won't need them for taking pictures. The Animations button opens the animation viewer, where you can find specific movements, useful when preparing a scene; more about this later. Spectator starts the newly introduced spectator camera, which uses the same camera mentioned in the PC Gamer article. However, the main star of the show is the brand new Splendid Camera, triggered by the Camera button. Designed specifically for taking screenshots, it's the tool you'll be using the most.
The first thing you'll probably notice upon entering the camera is that the scene is frozen. Units are not moving, tracers are stopped mid-air and explosions remains completely static. Compared to the previous camera, where the game kept running and timing action shots was a painful process, the ability to adjust the time speed and even stop it is the single most important feature of the Splendid Camera.
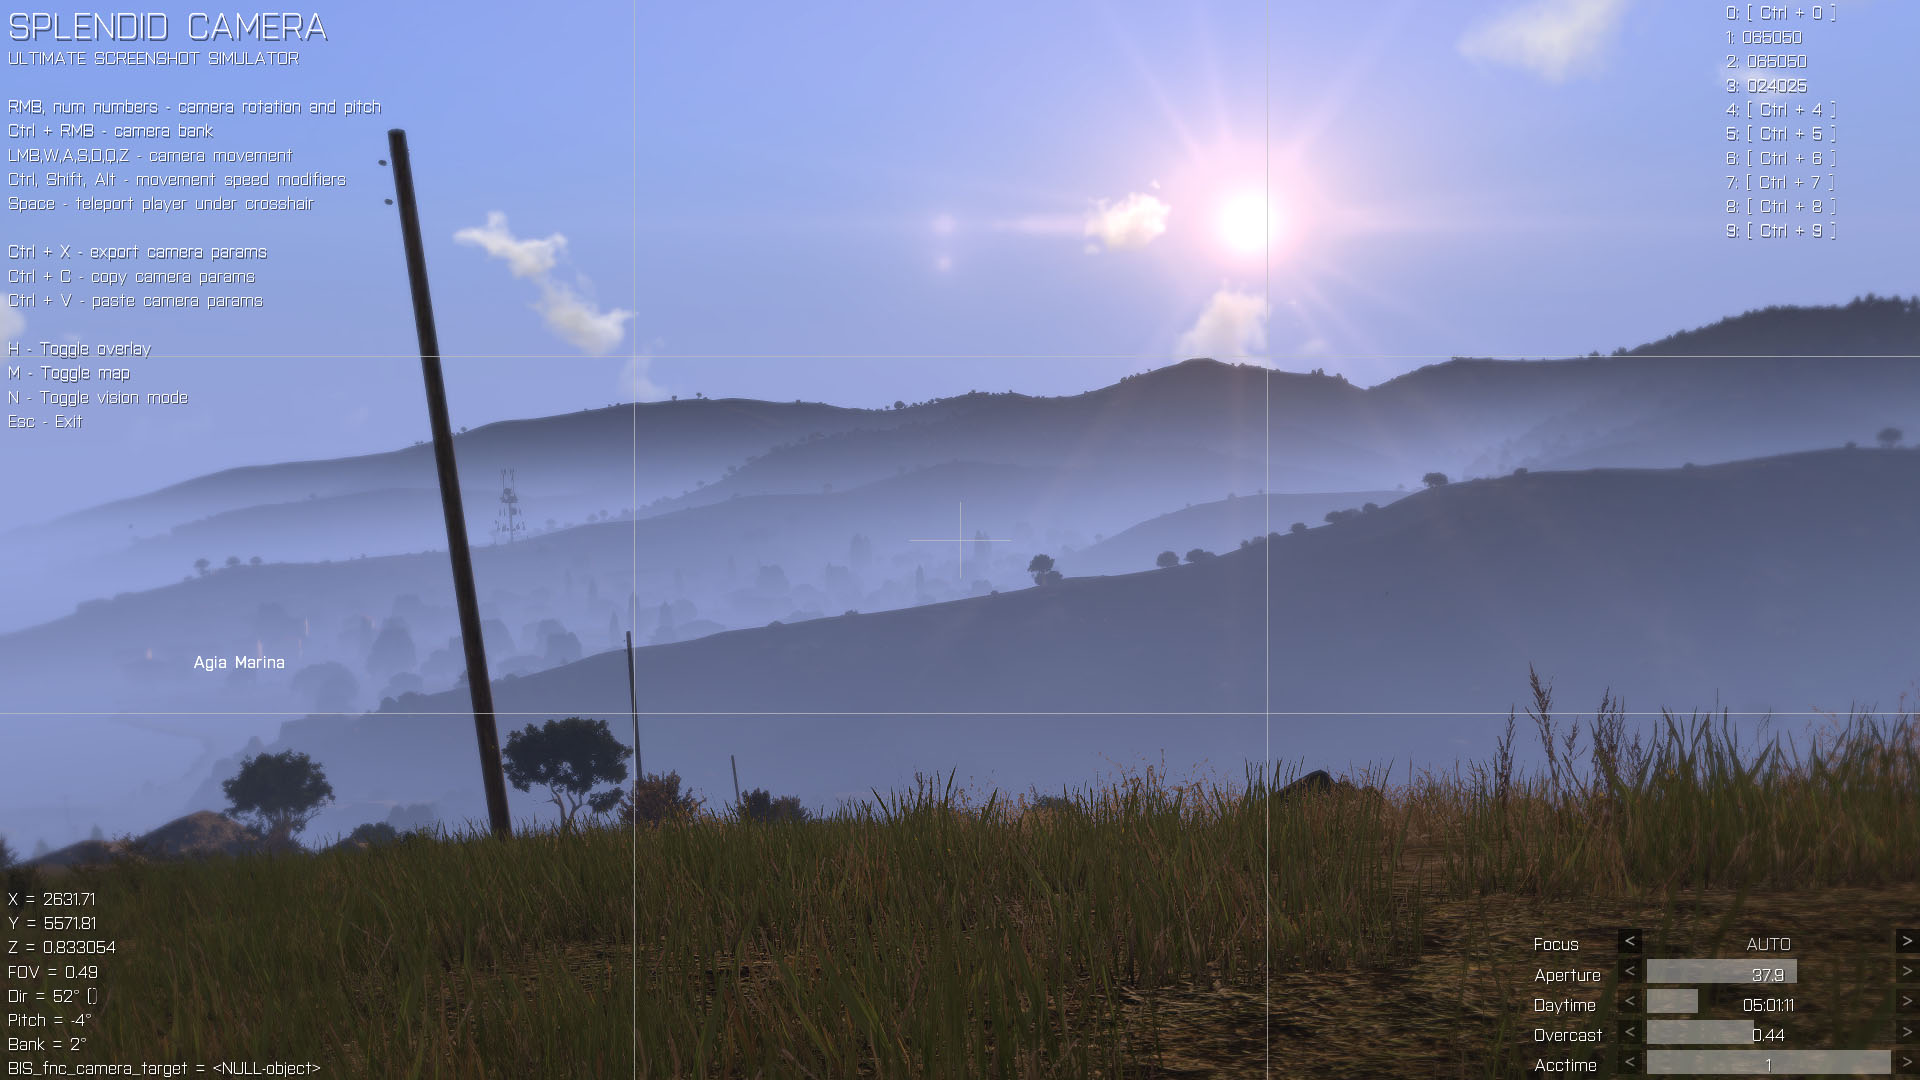
The camera overlay provides all the information you'll need. In the top left, you can find an explanation of all the controls and shortcuts. The bottom left corner shows information about camera parameters, like position or direction. The top right corner depicts previously saved camera settings, which can be restored any time. The bottom right corner contains sliders for adjusting scene visuals and environmental conditions. And finally, the horizontal and vertical lines divide the screen into thirds, helping you to align the scene composition.
Scene Adjustment
- Focus - set camera focus distance. Autofocus is used by default, which means that the engine automatically focuses on objects which are in the middle of the screen. While sufficient in mid- to long- distance shots, it's not as useful when the target object is just a few meters away. Many potentially awesome Arma 1 and Arma 2 images were affected by blurriness, simply because their authors had no means to set the focus manually. Not you though, because this slider will let you adjust the focus with centimeter precision, so even the closest objects can look razor sharp. If you move the slider all the way to the right, focusing will be disabled completely and all objects, no matter how far they are, will appear sharp. It's recommended not to use the last option, as it makes your pictures looks unrealistic.
 Aperture - determines how much light gets into the virtual lens, similar to real-life photography. The smaller the value, the brighter the scene is lit. Automatic aperture calculation is used by default, and as opposed to focus, it works pretty well. In case you want to tweak the value anyway, keep in mind that the lens takes some time to adjust, so you'll have to increase time acceleration in order to see the changes.
- Daytime - time of day on a 24-hour scale, with the default being set to the current mission time. When changing the time to a differently lit period (e.g., from day to night), you'll need to unfreeze the game for the aperture to adjust itself, otherwise the scene will preserve the previous settings. Each time of day offers different mood and lighting, so don't be afraid to experiment with it.
- Overcast - weather conditions, from clear (0) to storm (1). Default is set to the current mission weather. This one is a bit tricky to use; because of the volumetric cloud computation, the changes are committed only if some time passes. So when you change the weather, you have to move the time of day forward as well.
- Acctime - technical term used for time acceleration. This is what freezes the scene at the start, because the default value is set to 0. Moving the slider right increases the acceleration up to 1x, or a normal speed.
Camera Controls
The controls are based on helicopter and plane controls. However, the basic camera movement and rotation can be controlled using the mouse only.
As opposed to the previous camera system, you can now manipulate with camera roll, a feature that can instantly add a dramatic effect to almost any screenshot.
- Hold LMB and move - move camera around, RTS-style
- Hold RMB and move, Numpad numbers - rotate camera
- Hold Ctrl + RMB and move - adjust camera roll
- W,A,S,D - move camera around
- Q,Z - change camera height
- Hold Shift, Alt or both together - increase movement speed
- Numpad +/- - set camera zoom
- Numpad 5 - reset camera bank and zoom
Saving Camera Parameters
When setting up a scene, you'll constantly be returning back to the editor for tweaking object compositions. To prevent having to reposition the camera over and over again, you can save up to 10 camera parameters to your profile, so they'll be available even when you restart the game. All customizable settings are stored - camera position, direction, bank, zoom and focus, but also aperture, time of the day, overcast and time acceleration.
Apart from that, you can copy the same parameters using Ctrl+C and restore them later with Ctrl+V. They're copied to the standard clipboard, so you can paste them to any text editor and store them externally. There's also the ability to export parameters including camera execution, which - when executed from the debug console's expression field - will start the camera and automatically load the settings.
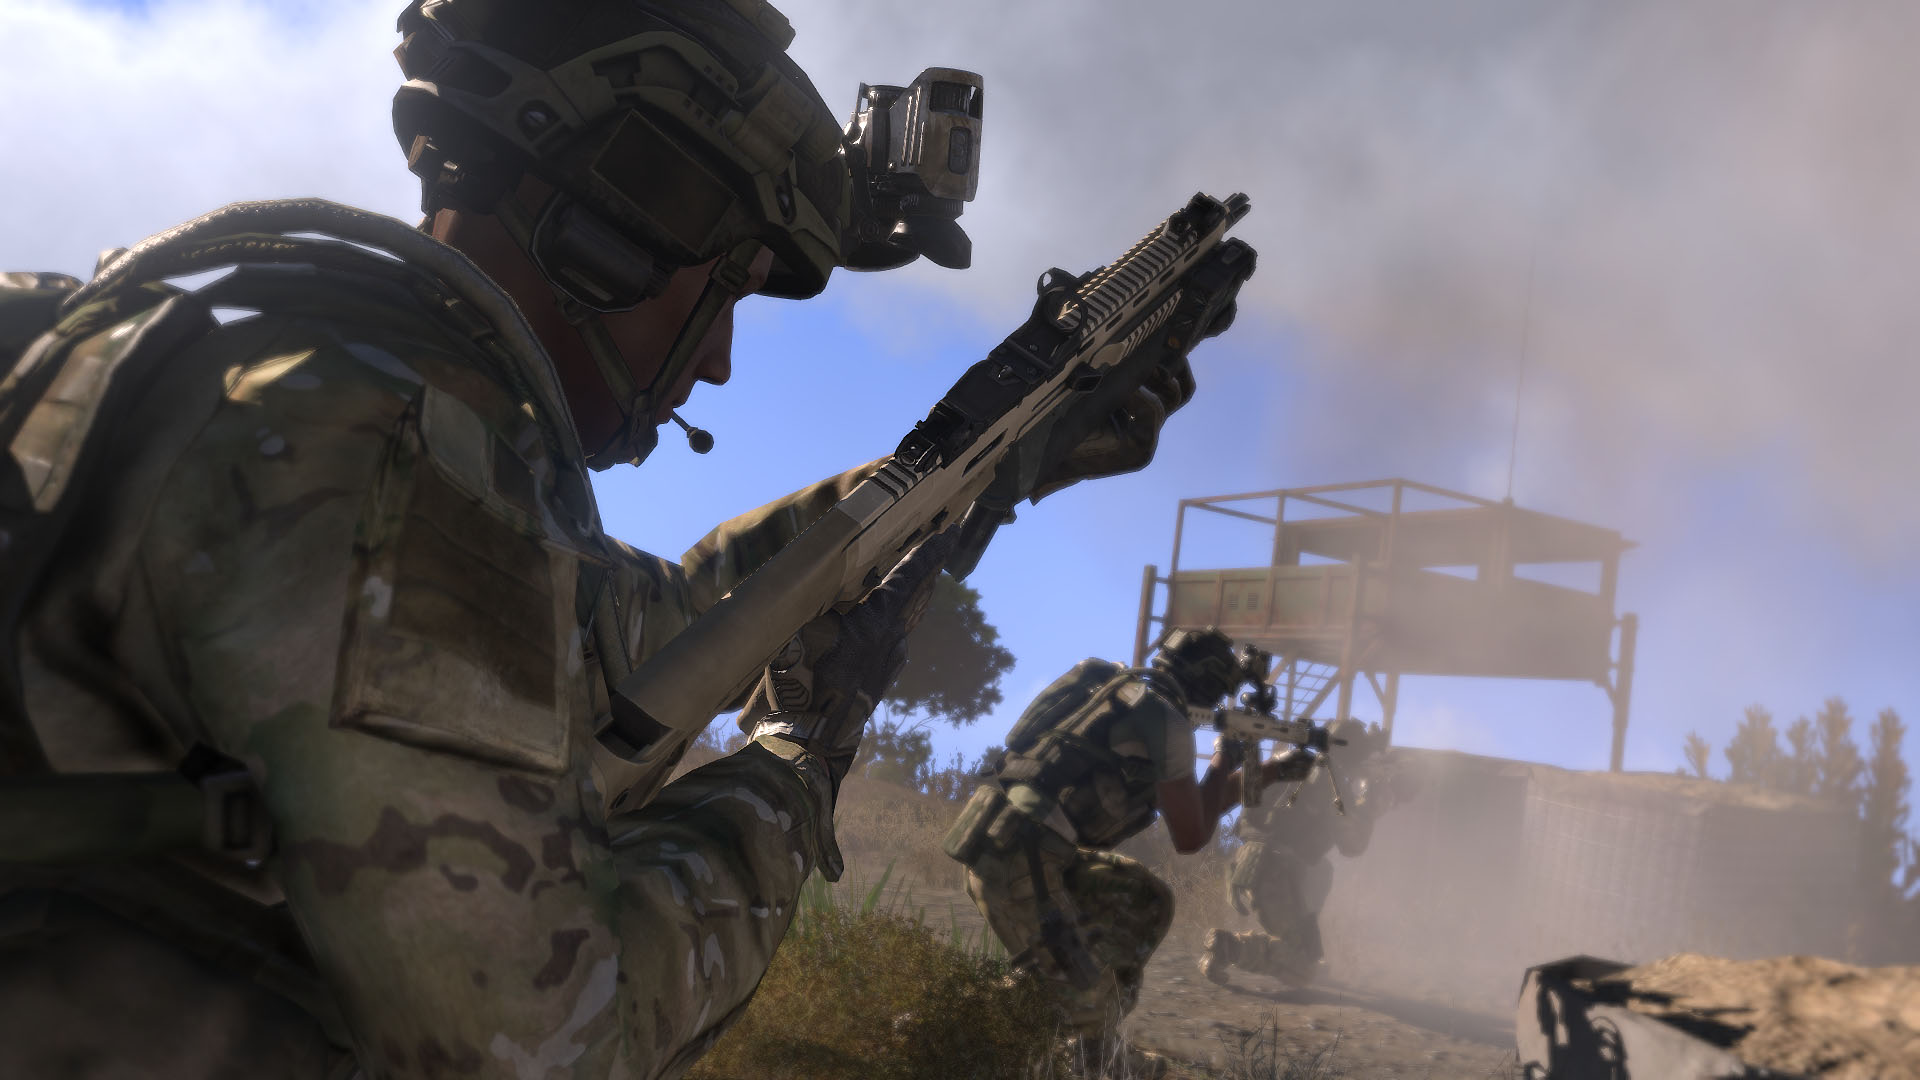
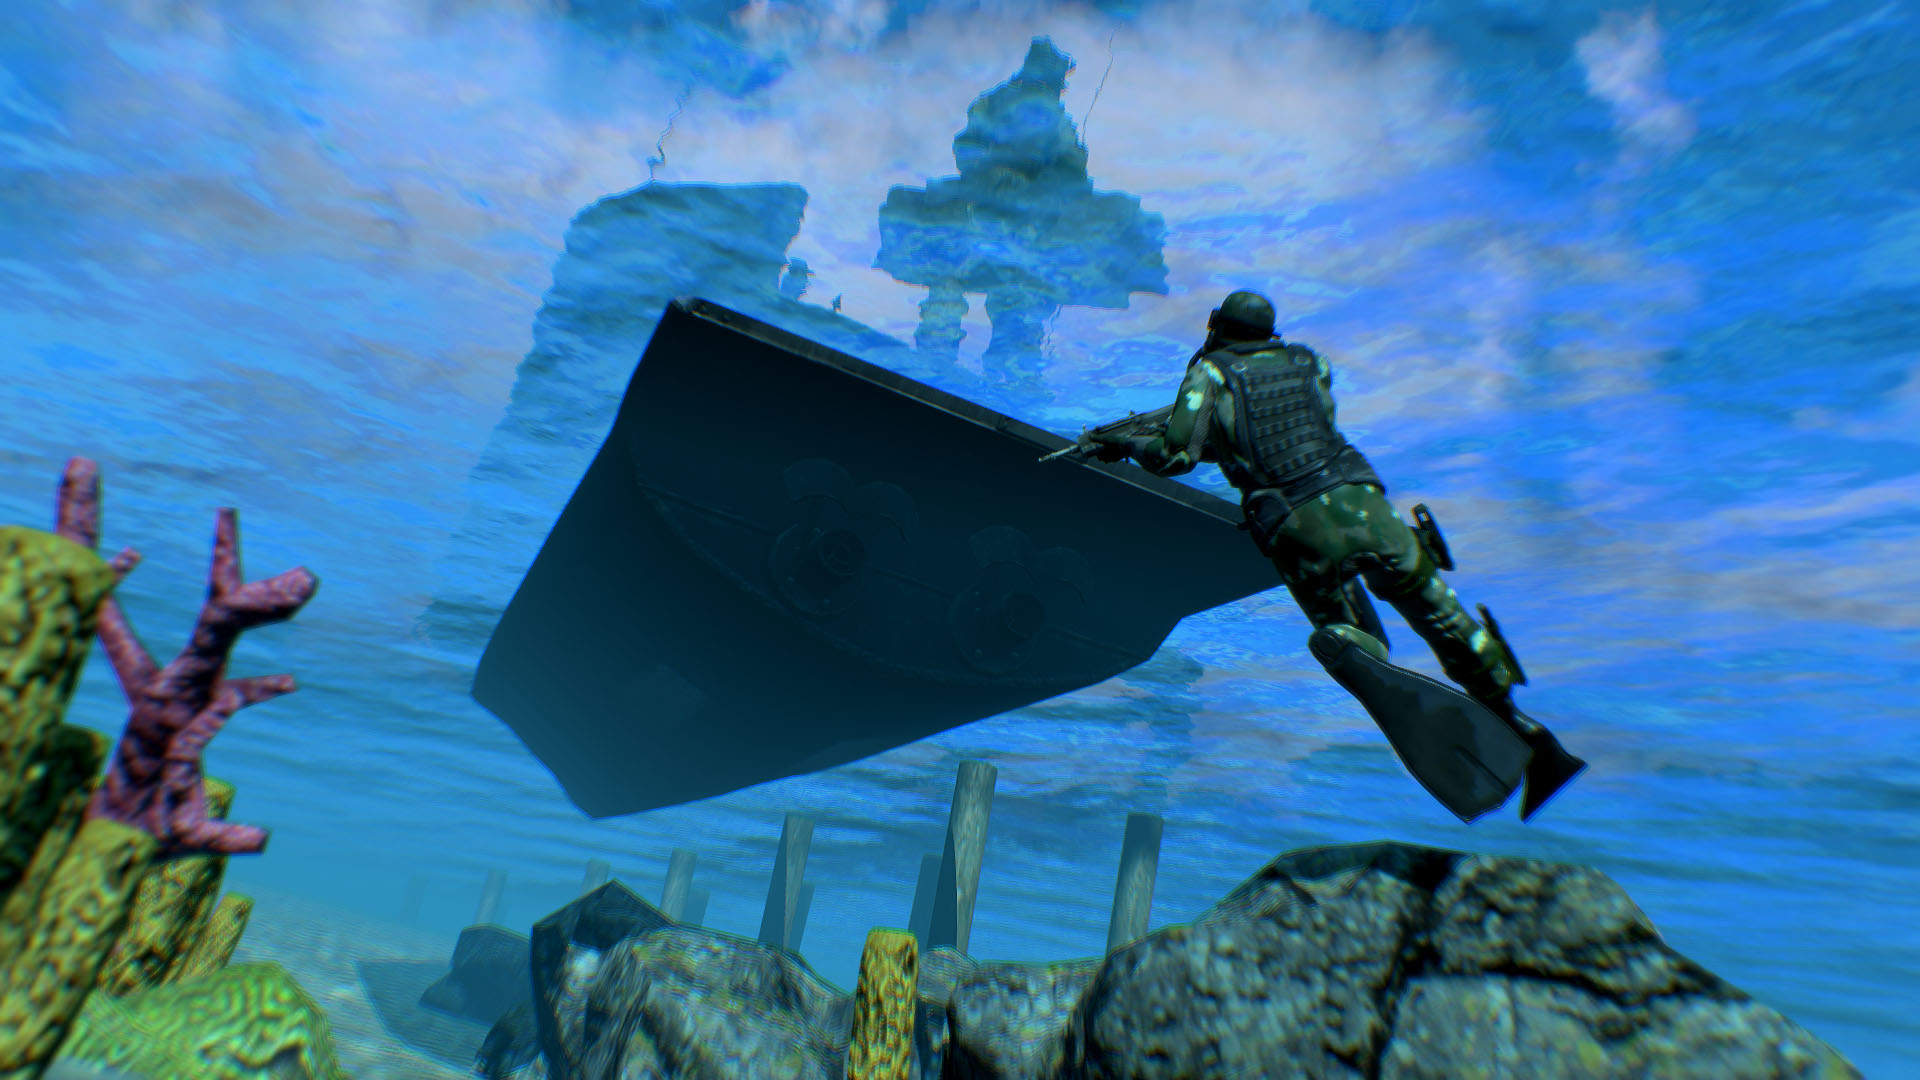
For example, you can restore the picture below the header by calling the following expression:
["Paste",["Stratis",[2631.71,5571.81,0.833054],51.9635,0.49,[-3.80956,2.41325],0,6.15604,5.01998,0.439988,1]] call bis_fnc_camera;
- Ctrl + 0-9 - save camera parameters
- 0-9 - restore camera parameters
- Ctrl + X - export camera params
- Ctrl + C - copy camera params
- Ctrl + V - paste camera params
Additional Features
- F1 - open the debug console. When pointing at a target, it's stored to variableBIS_fnc_camera_target which you can freely manipulate with.
- Space - teleport player under crosshair
- H - toggle overlay
- M - toggle map. Clicking LMB on the map will move camera under the cursor.
- N - toggle vision mode (normal, night vision, thermal vision)
- Esc - exit. You'll be asked for confirmation, so you don't need to be afraid of accidental activation.
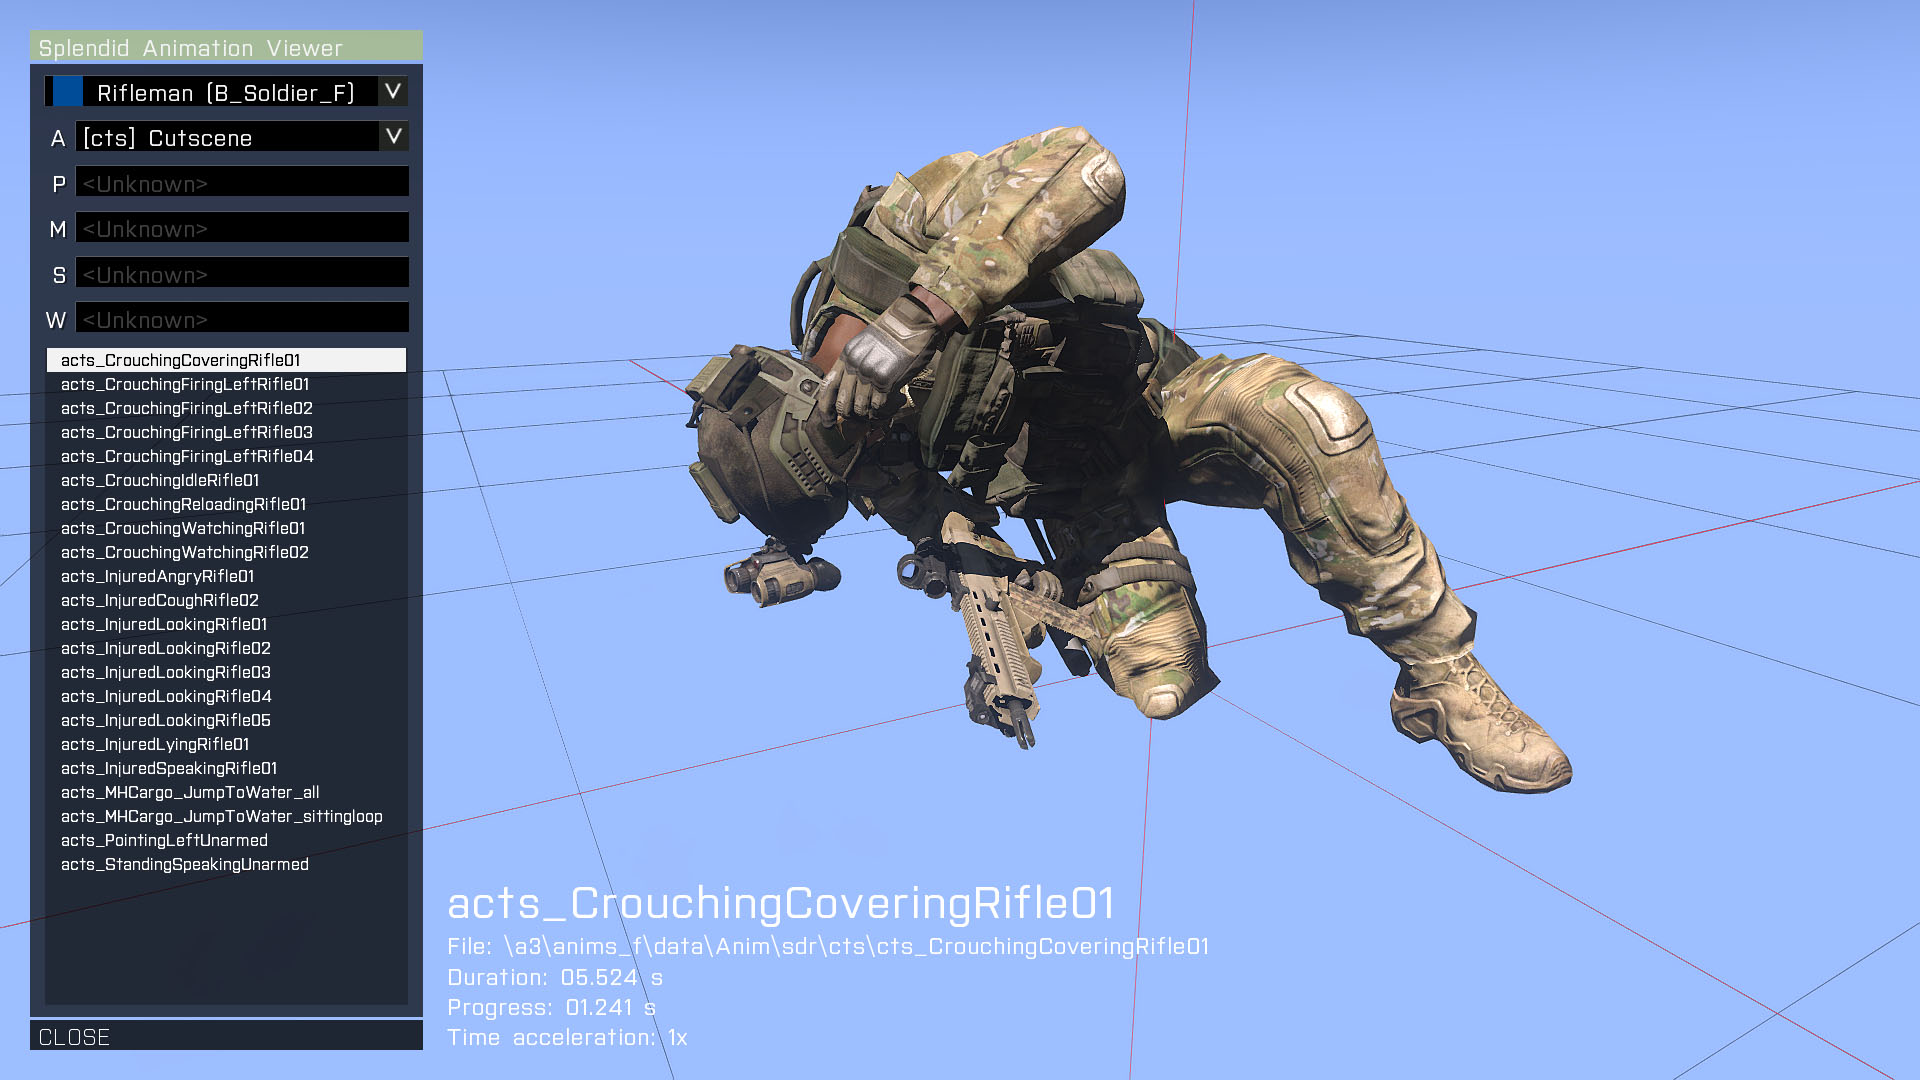
Let's now return to the debug console and check out one more handy tool - the animation viewer. It takes some time to load, because it's crunching through all animations in the game (including community ones, when there are any) and sorting them into logical categories. When animations cannot be categorized, they are automatically sorted into the category. Many legacy animations from Arma 2 suffer from wrong categorization and you can find them here.
As for controls, they are much simpler than those of the Splendid Camera:
- Hold LMB and move - move camera
- Hold RMB and move - rotate
- Rotate mouse wheel - move camera forward / backward
- Ctrl + C - copy animation name
- Ctrl + X - copy a code for opening the viewer with specific animation selected
Playing Animations
Once you picked an animation you want to use, you need a way to play it on a person. The easiest way is to insert the following code to the init field of a soldier:
0 = this spawn{_this switchMove "acts_CrouchingCoveringRifle01";};
You can't play the animation straight in the init field, because the engine cannot play animations upon mission start and some delay (provided by spawning an additional code) is required.
There will be times when you'd want to freeze the animation on a cool looking spot, so you don't need to worry about timing. To achieve this, simply add a delay after playing the animation (3 seconds in the example) and then disable simulation of the soldier:
0 = this spawn {_this switchMove "acts_CrouchingCoveringRifle01"; sleep 3; _this enableSimulation false;};
Now you know the basics, let me share some general tips for preparing a scene specifically for taking screenshots.
- To prevent unexpected deaths of crucial soldiers, make them invincible by inserting the following code to their init lines:
this allowDamage false;
- Make all participants playable, so you can always switch to them and adjust their position, direction and so. In the editor, you can set unit control by editing it and setting CONTROL to "Playable" (pink color). Even if you forget to do it, there's a way to take over someone else's body using debug console. Simply point at the unit and execute following code from the console’s expression field:
- To prevent an unintentional bloodbath when your scene contains soldiers of multiple factions, make them neutral using the following init line:
this setCaptive true;
- Arma 3 introduced a detailed inventory system which allows you to customize uniform, vest, helmet, goggles, etc. Soldiers included in editor looks pretty much the same and your scene may easily become a clone parade. Take your time and switch to soldiers, customize their gear to give them a more unique look. If you can't be bothered to do it every time you run the mission, there's a code that can do it for you:
Remove all weapons:
removeAllWeapons this;
Remove helmet:
removeHeadgear this;
Remove night vision goggles:
this unassignItem "nvgoggles";
 this removeItem "nvgoggles";
 Make sure that the scene contains clouds. These help to give the scene depth. You can make the weather worse either in Splendid Camera, or in the Intel menu, which is available in the editor either by clicking on the "Intel" icon or via the Ctrl + W shortcut. However, really bad weather will obstruct the sun and hide all shadows, making your images look flat instead.
- Don't use default zoom, almost all shots looks better when the camera has been zoomed in. It will make objects in the distance appear bigger, increasing the contrast between background and foreground.
- When you’ve found a perfect shot in Splendid Camera, but one of soldiers / objects is not placed perfectly, you'd normally have to exit the camera and re-adjust the scene from the beginning, losing the perfect moment in the process. However, since you can access the debug console from splendid camera, nothing stops you from making adjustments on the fly.
- Simply point at the object you want to tweak (a frame will appear around it) and open the console. The object is now stored in the variable BIS_fnc_camera_target, so you can for example find its position by copying the following code to a watch field:
position BIS_fnc_camera_target
The result will be XYZ array, looking like this
[4161.46,7307.62,0.00572705]
The first value is coordinate east-west, the second is south-north, and the last one is altitude above ground.
To teleport the object for example 1 meter to the east, place the
BIS_fnc_camera_target setPos [4161.46-1,7307.62,0.00572705]
Alternatively, you can teleport yourself simply by switching BIS_fnc_camera_target for player.
- Roll the camera slightly to the side (usually less than 10 degrees) to add a feeling of movement. It's a very simple trick which can drastically improve the screenshot.
- By default, characters are blinking periodically. It's a nice touch while playing, but as in real life, it may complicate taking pictures. Always check if people in your shot have their eyes open.
- Arma 3 allows you to adjust color post-process effects on fly, removing the necessity to do it in programs like Photoshop. Explaining them here would take too long, so let me simply point you to our community wiki.
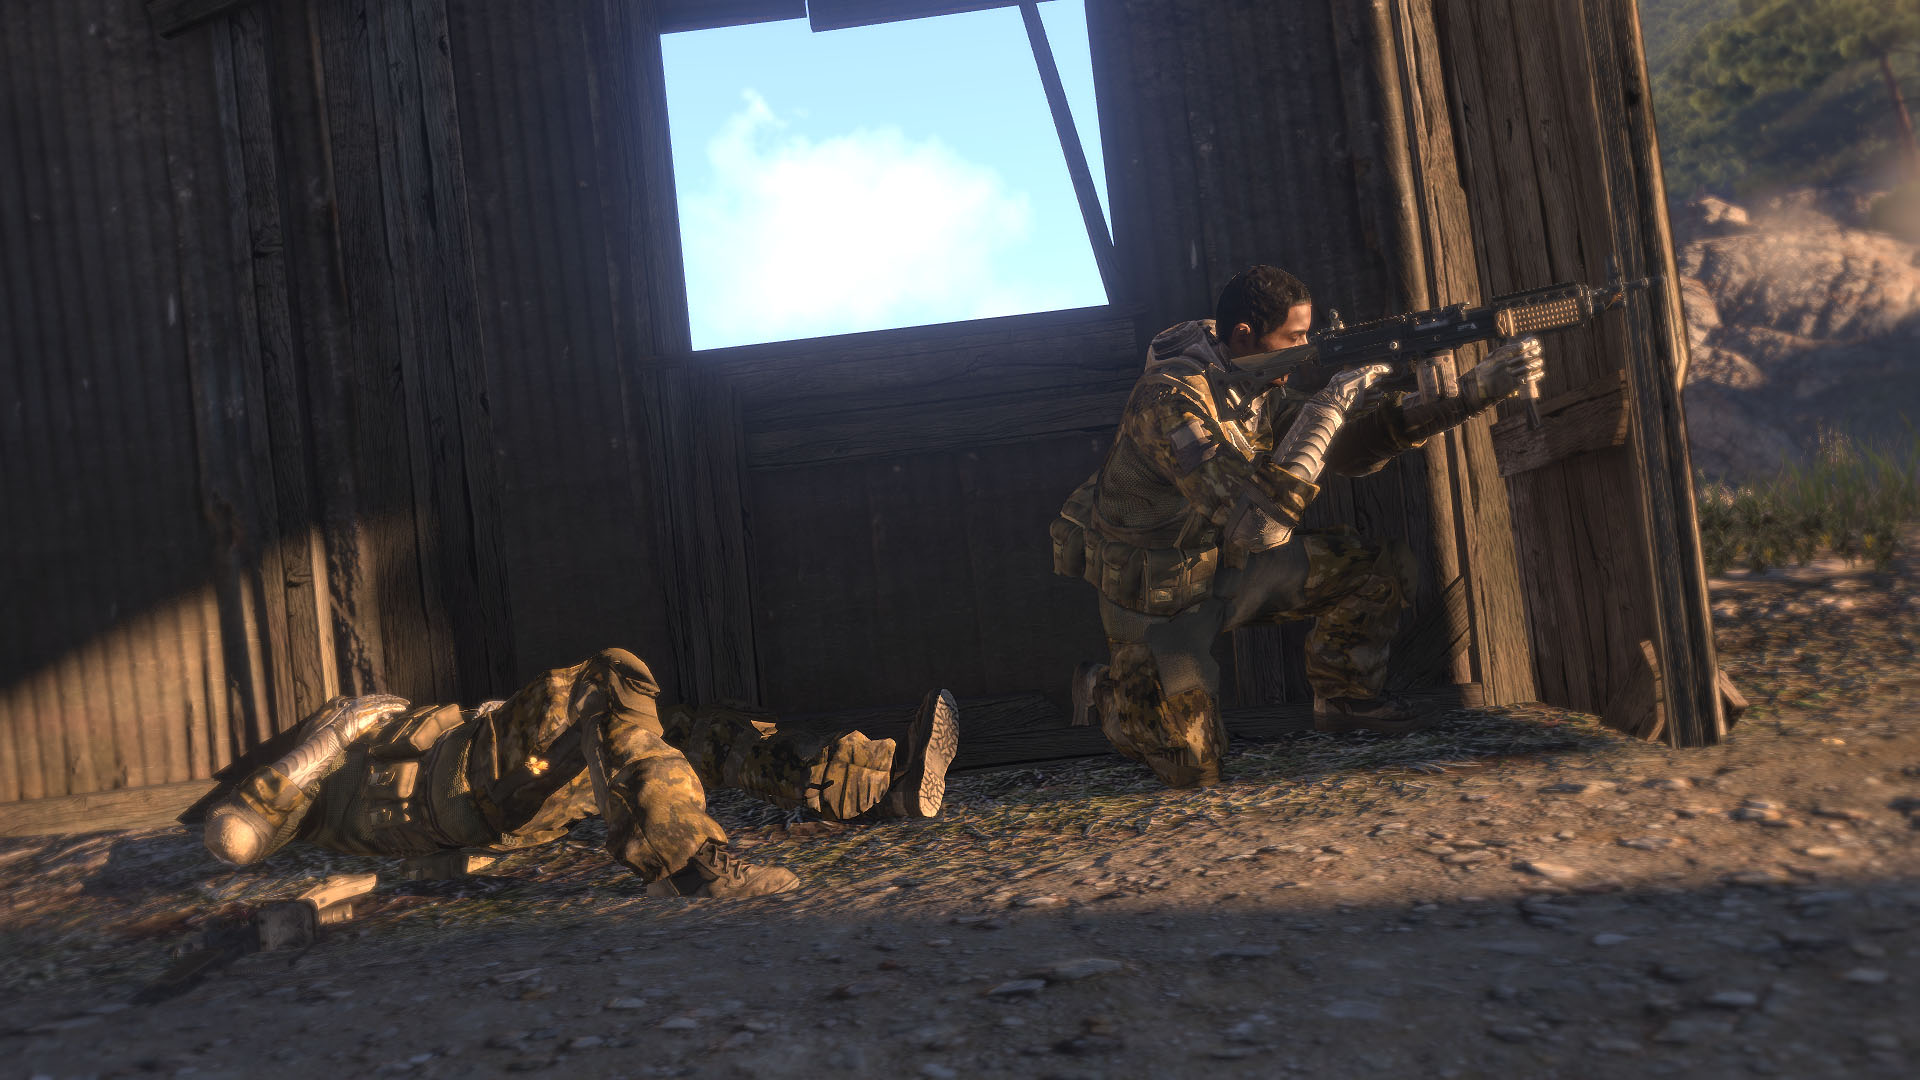
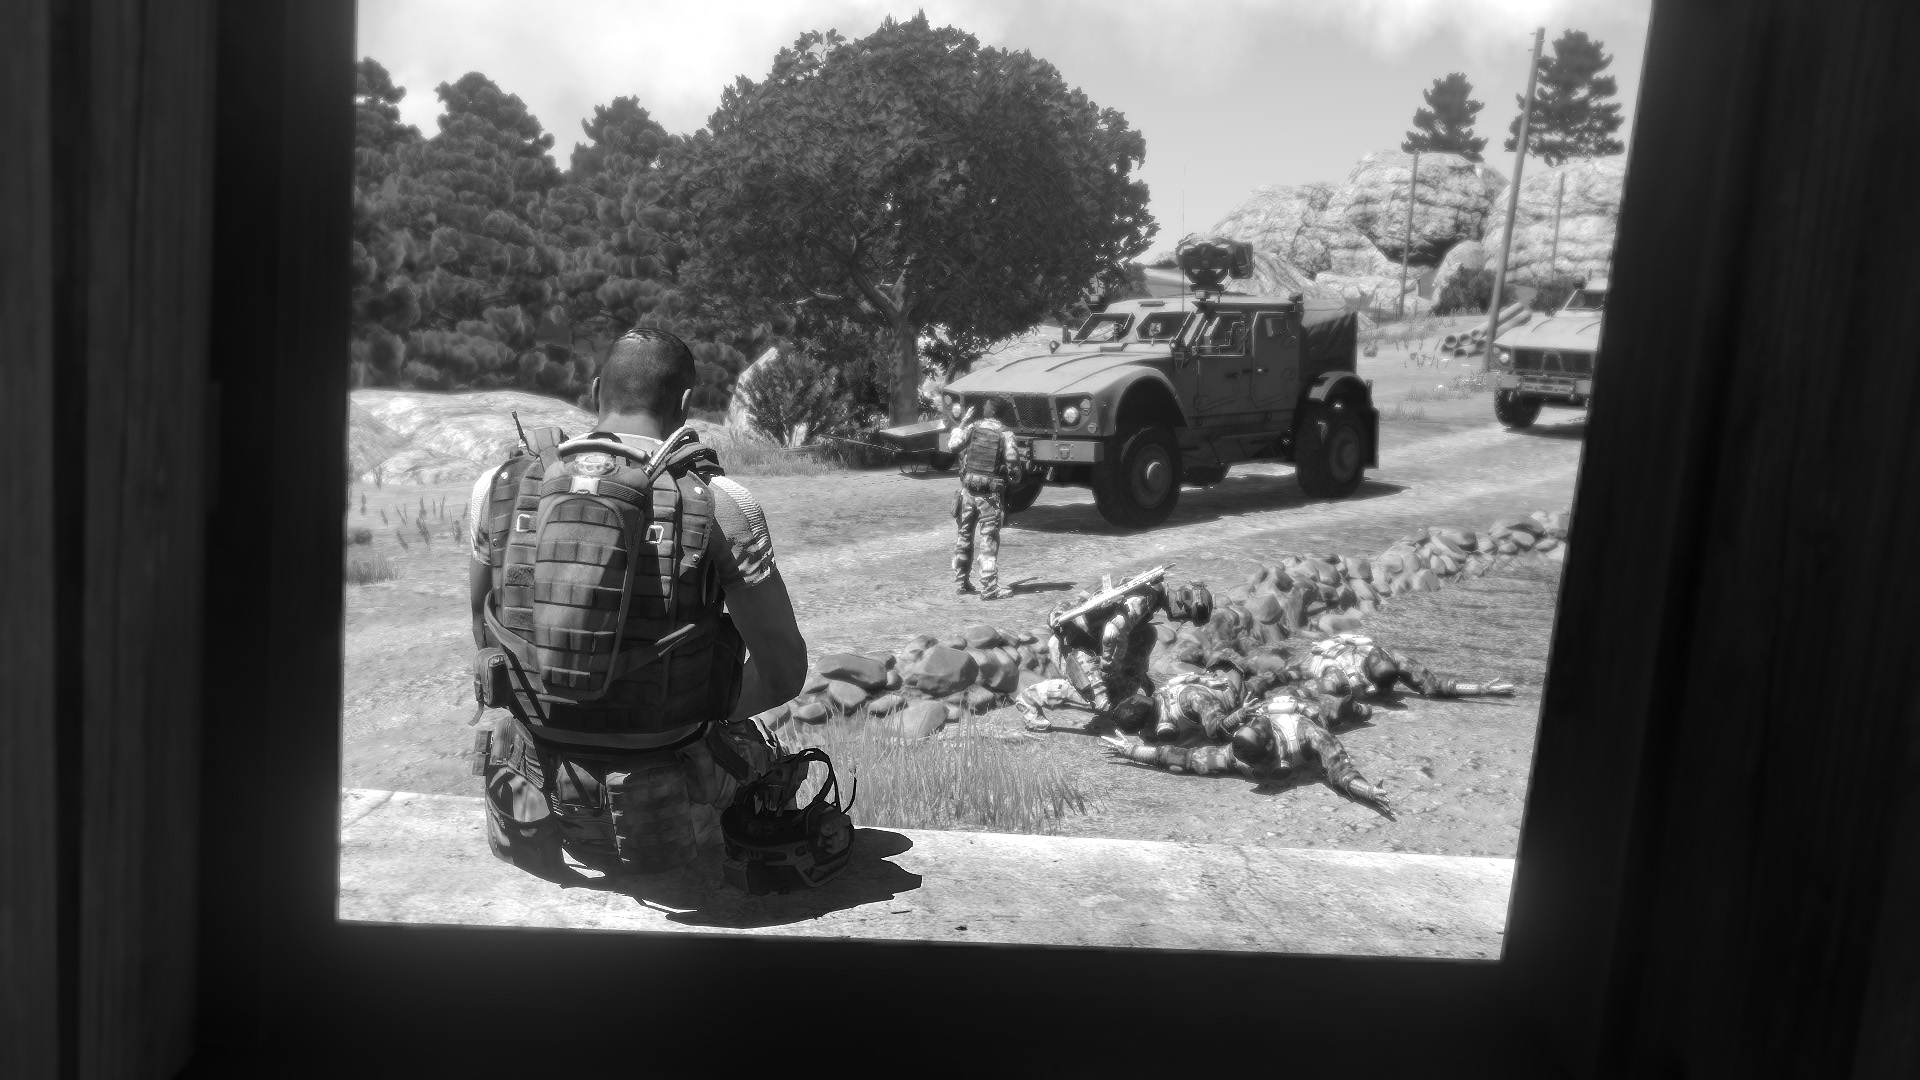
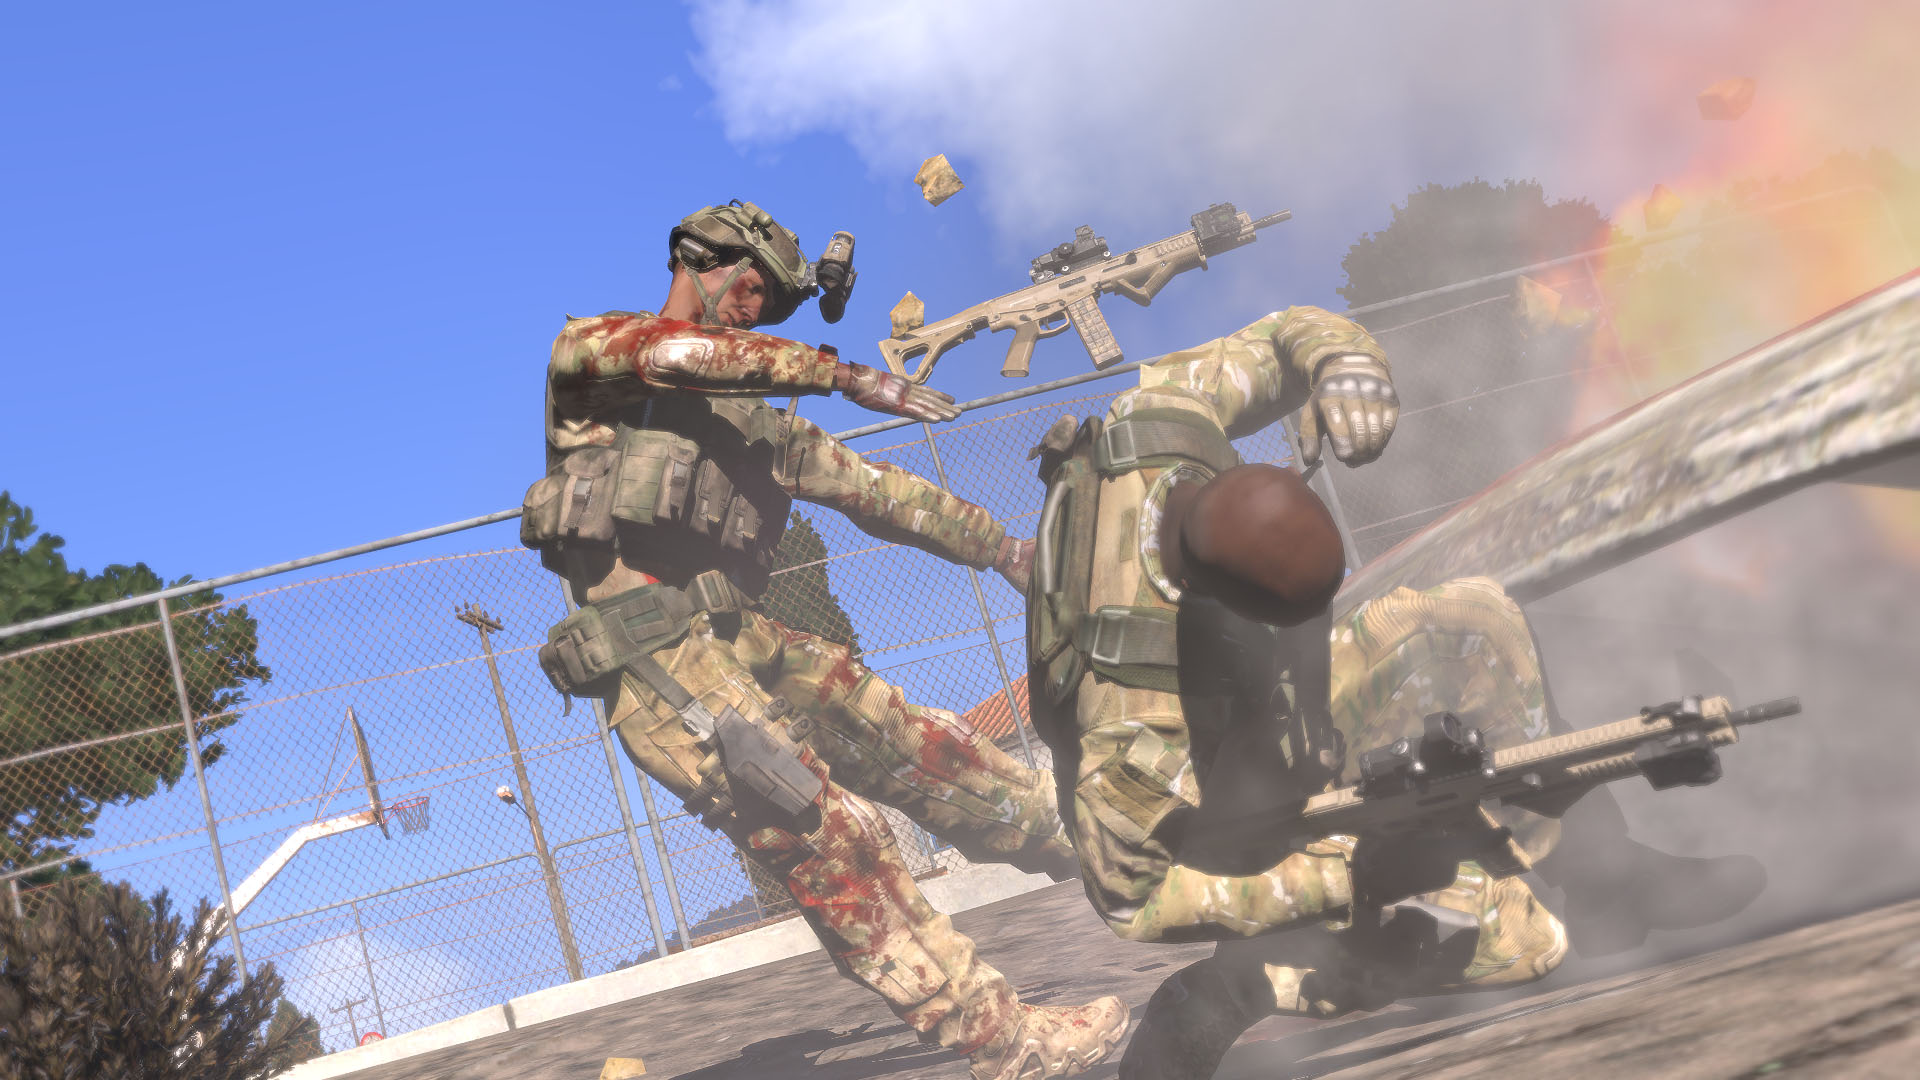
It's inevitable that you'll encounter some visual glitches while taking screenshots - collision issues, animation deformations, lighting problems, you name it. Most of today's games suffer from this, and the more you play, the less you notice them. But show a picture to non-gamer and you'll be surprised by how many things out of place they spot.
For example, look at the image above. I guess at the first glance, it appears to be completely fine. Let's take a closer look.
- Notice the shooter's right foot and see how it goes through the wooden wall behind him. Moving or rotating him might solve this issue.
- Because of slightly sloped terrain, the injured soldier is sunk into the ground, which is especially noticeable on his right foot and on the weapon next to him. Again, moving him up a bit or rotating him could be a viable solution.
Internally, we have very strict rules for releasing images and even the smallest of collision glitches can render a picture un-publishable. However you don't need to worry that much, because if a picture is otherwise amazing, no issue can harm it. After all, it's our fault the game is not perfect.
War Photography
 We start looking at photos at an early age, seeing them every day in newspapers, magazines and, most recently, on the Internet. By now, you’ve probably seen thousands and thousands of photographs. Some were good, some bad, and the majority just average. And there are a few truly excellent ones, which you still remember and think about. You may not recognize the names of Robert Capa or Joe Rosenthal, but you definitely know their work.
And because of this experience, you also know when a screenshot isn't right. With splendid camera, animation viewer or in-game scripting, you have almost unlimited possibilities for capturing an ideal image. Where real-life war photographers are risking their lives in their hope for a lucky shot, you can freeze the scene, set the time of the day, and position the camera anywhere you want. Yet it doesn't mean you should. When taking a screenshot, approach it like you were standing behind the camera. Could you reach the spot where it is? Would you actually want to, or would it be too exposed to enemy/friendly fire? Are you interested in the scene only because it's 'cool', or is it strong enough to tell a story? And could it mean something also for people unfamiliar with the game?
Arma 3 is an authentic game, and it provides a great opportunity to take diverse screenshots. Now you know how, it's up to you to turn your inspiration into splendid images. Don't forget to share your work on Steam, on the official forums or on our Twitter and Facebook channels.
Note: All of the attached screenshots were taken in the publicly available Arma 3 Alpha, using the same methods described in this guide. No post-processing in an external image editor was applied..
COMPETITION: 2013 World Arma Photo
The competition is now closed and we'll be revealing the winners later this week. Thanks everyone for participating!